
Ahh the heat has finally broke here in Newport Beach and we can finally work on our Airstream without sweating so much! If you missed our Airstream renovation update last week, you can catch up here. Today begins the framing of our kitchen dinette table. In the picture below, we’ve used painters tape to indicate where the frame will be built. Once the bottom frame is built, we can easily peel the tape up and throw it away.

While building the dinette, we have to keep in mind the weight we’re adding to the trailer. So we’ll be using 1 in x 2 in pieces of wood from Home Depot to create the frame. Once the frame is complete, we will sturdy it up with fascia pieces.

The hardest part about building a piece of furniture in an airstream are the round walls. Everything has to be meticulously measured to make it fits snuggly against the walls before it can be cut. Josh is using a straight edge to make sure everything stays square with the floor.

We’re building the frame like a ladder to equally space the supports and distribute the weight. Josh is using a 6.5 Amp Jig Saw to cut the wood. After each piece is cut, it’s my job to sand them with our sanding block so they are nice and smooth for painting.

You can see that the right side of the frame has gone up quickly! The vertical beams are attached with screws from below and from the top. All the holes for the screws have been pre-drilled to make a pilot hole, ensuring that the screws go in straight and are flush with the top surface of the wood.


Yes, we are totally cutting wood on an old paint can. Pay no attention to that, we don’t have much space to work in..and yes we work barefoot…don’t judge! Josh was healing from a toe infection and could not wear shoes without immense pain.

A little tip for you, always use two drills. It will save tons of time switching between a drill bit and your phillips bit. We are using multi-purpose wood screws because they seem to slip less often, making them harder to strip. We bought an entire bucket of them so they last a long time.

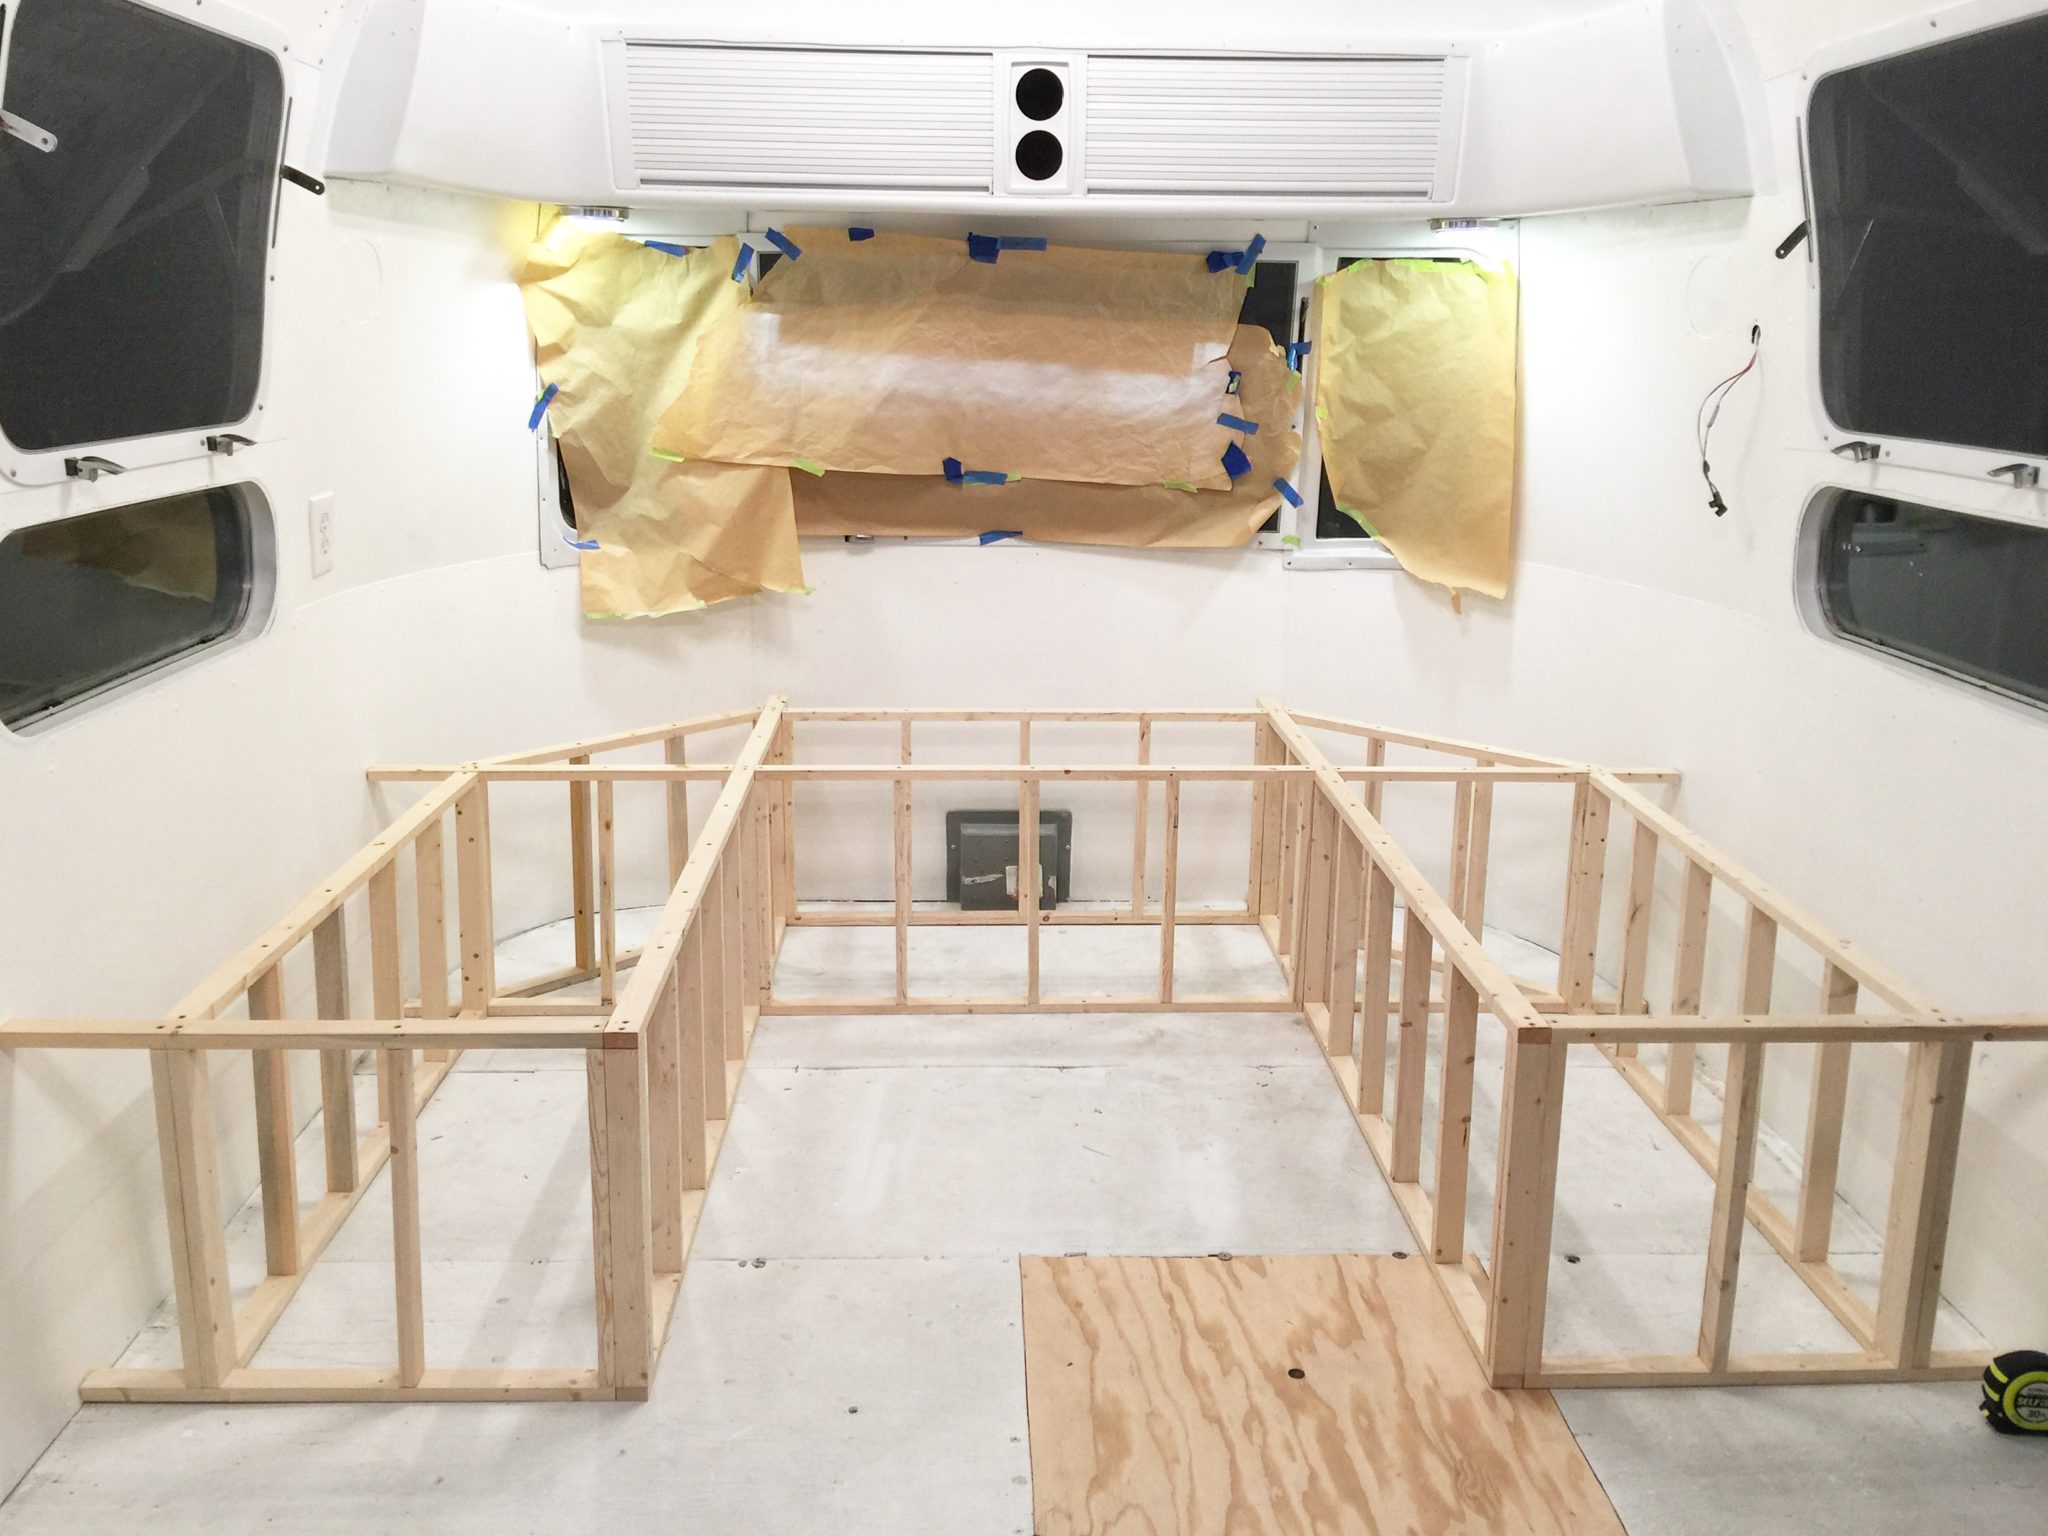
Here’s the finished bottom frame! One side was assembled at a time and then connected in the middle out of convenience. This allowed Josh to make sure that the frame would have the most snug fit possible in the space while still having the freedom to move the separate pieces around in our limited workspace.
Watch below to see behind the scenes footage on our vlog channel…and make sure to subscribe!
Next week we will be adding the fascia boards to the frame…can’t wait to show you! If you’ve just found us, be sure to start at the beginning of our Airstream renovation.
Have a great weekend!
I’m excited to watch your progress. I adore your vlog too :) :)
Hi! Love the remodel job so far! I keep checking back to see the next set of photos after this because my wife and I have an identical airstream and I’m really wanting to see what the final result is of what you’re doing. Any chance you have finished the front and have photos yet?
You can see more updates here! https://www.youtube.com/channel/UCbIhqyvaiWPklm5yf_q1_NA?view_as=subscriber